Pastry making class week 5 – Mille Feuille with Rough puff pastry

 Mille Feuille

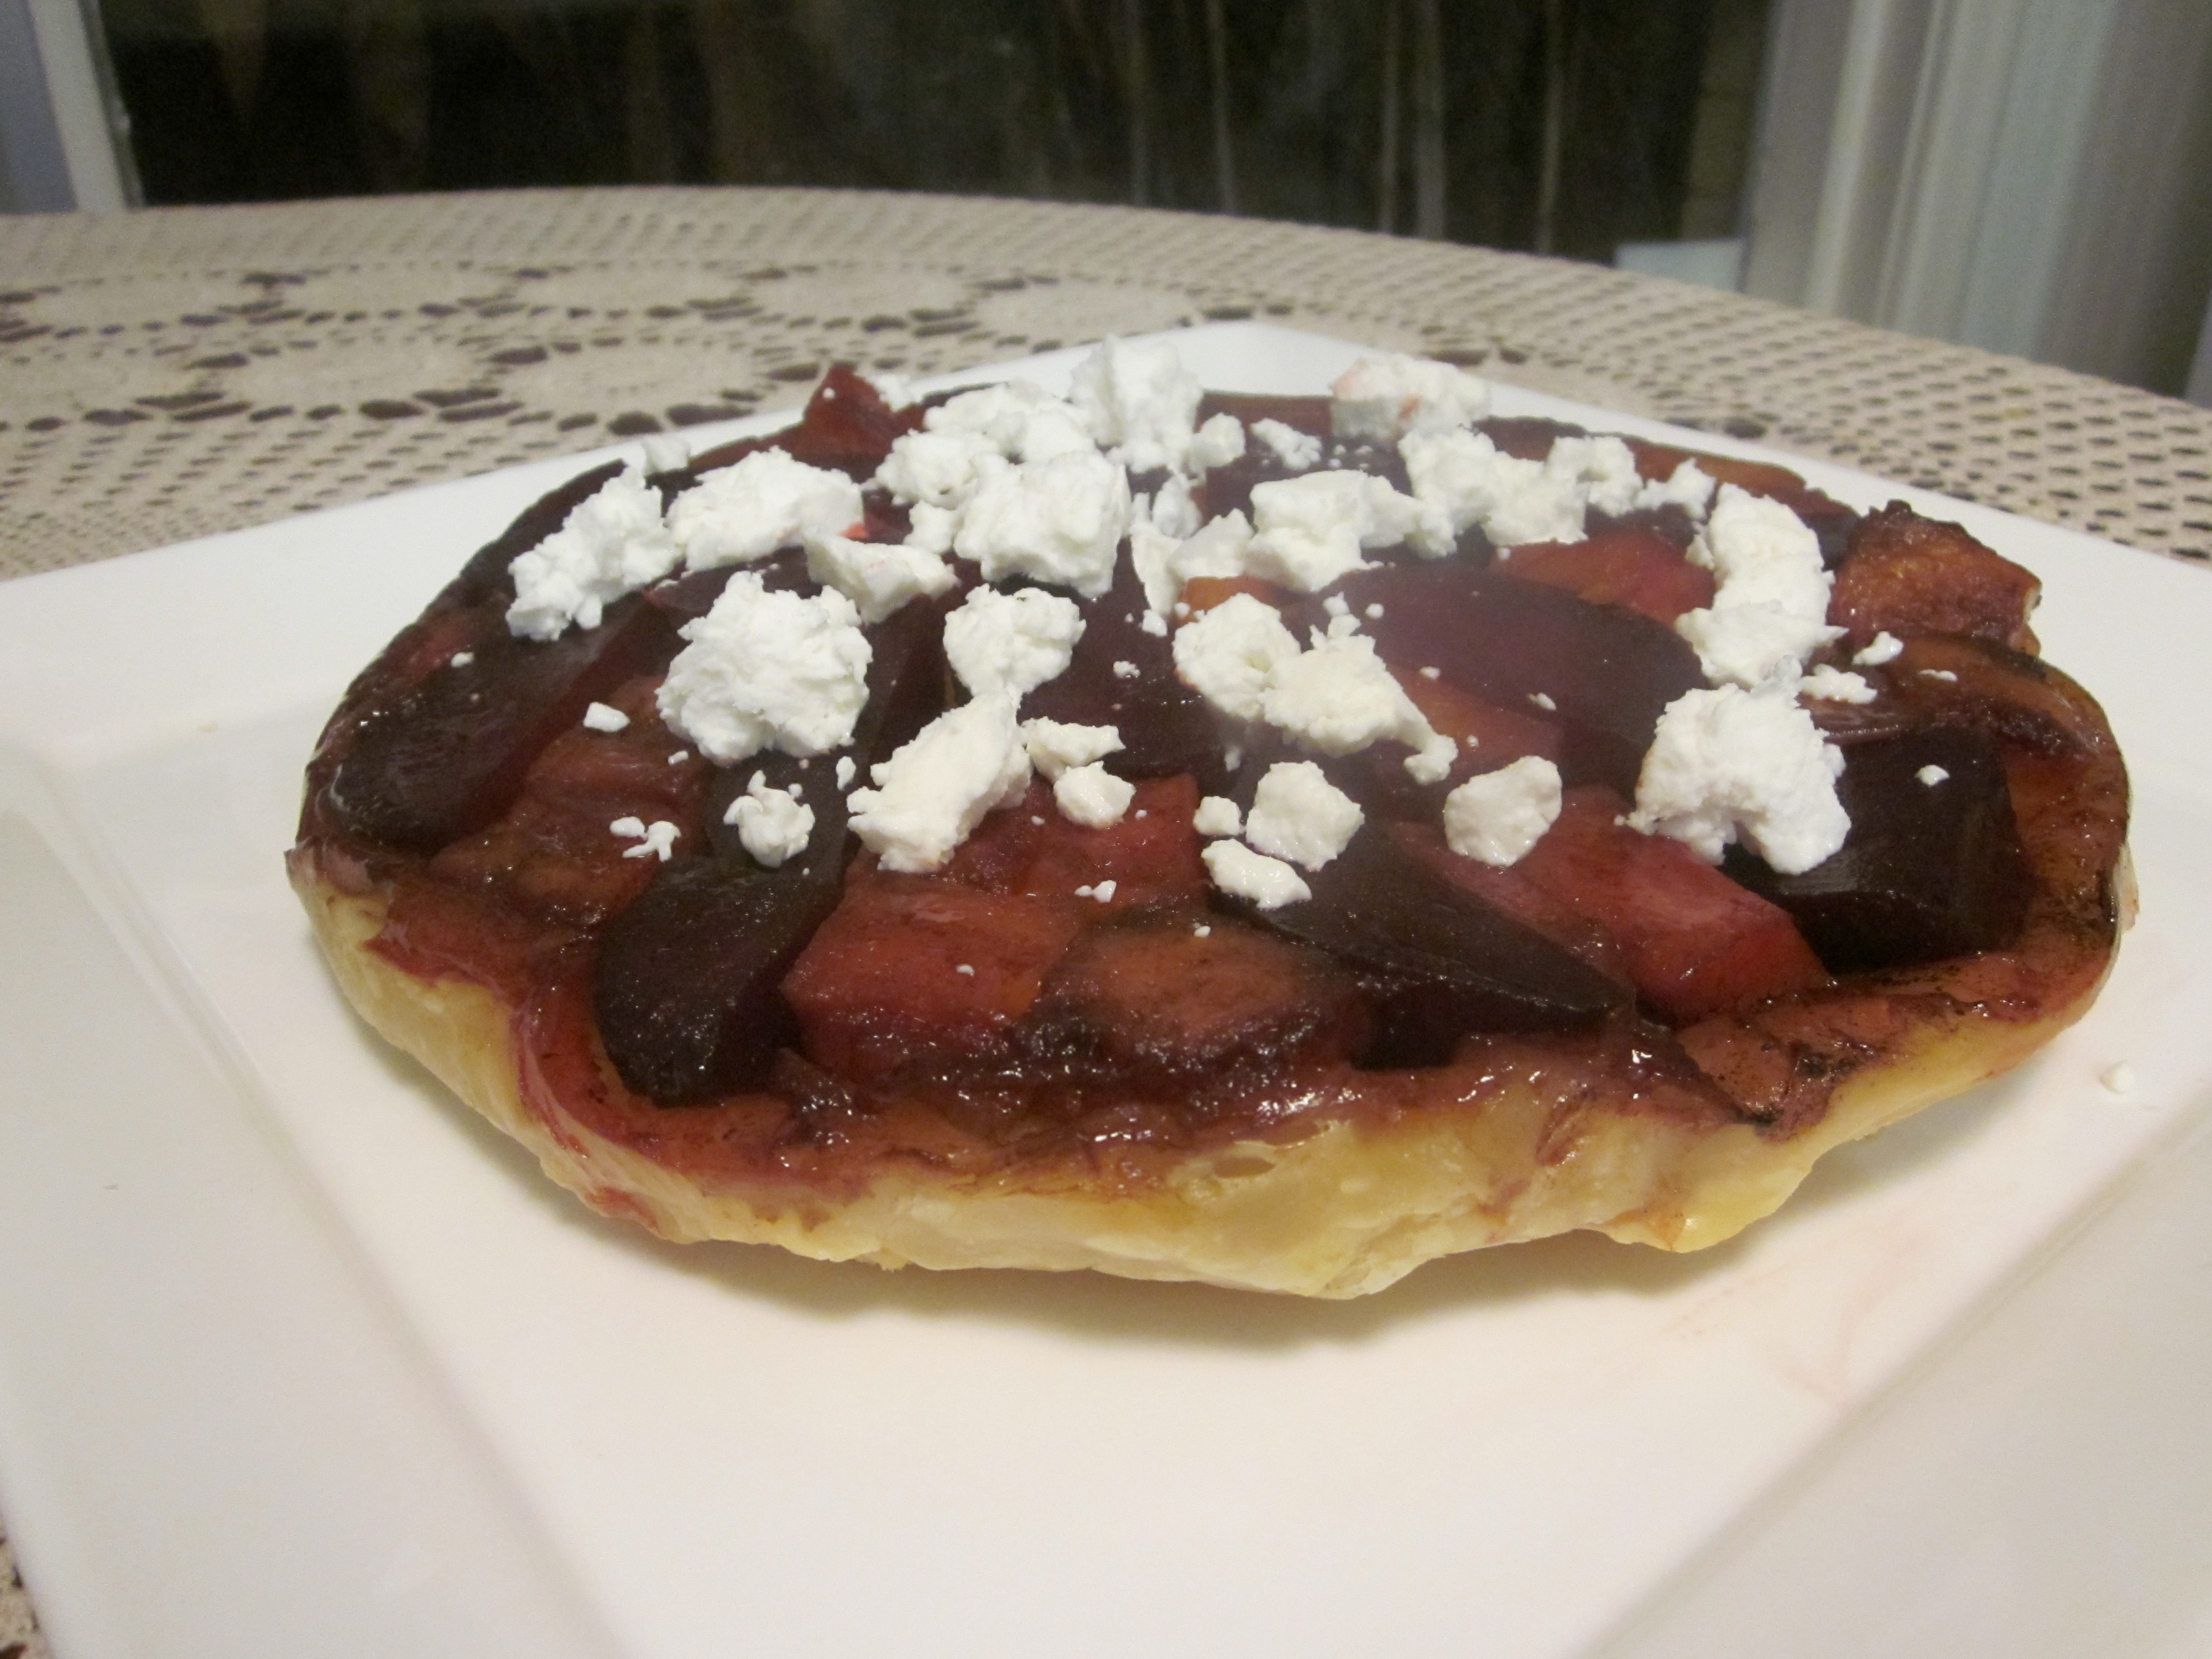
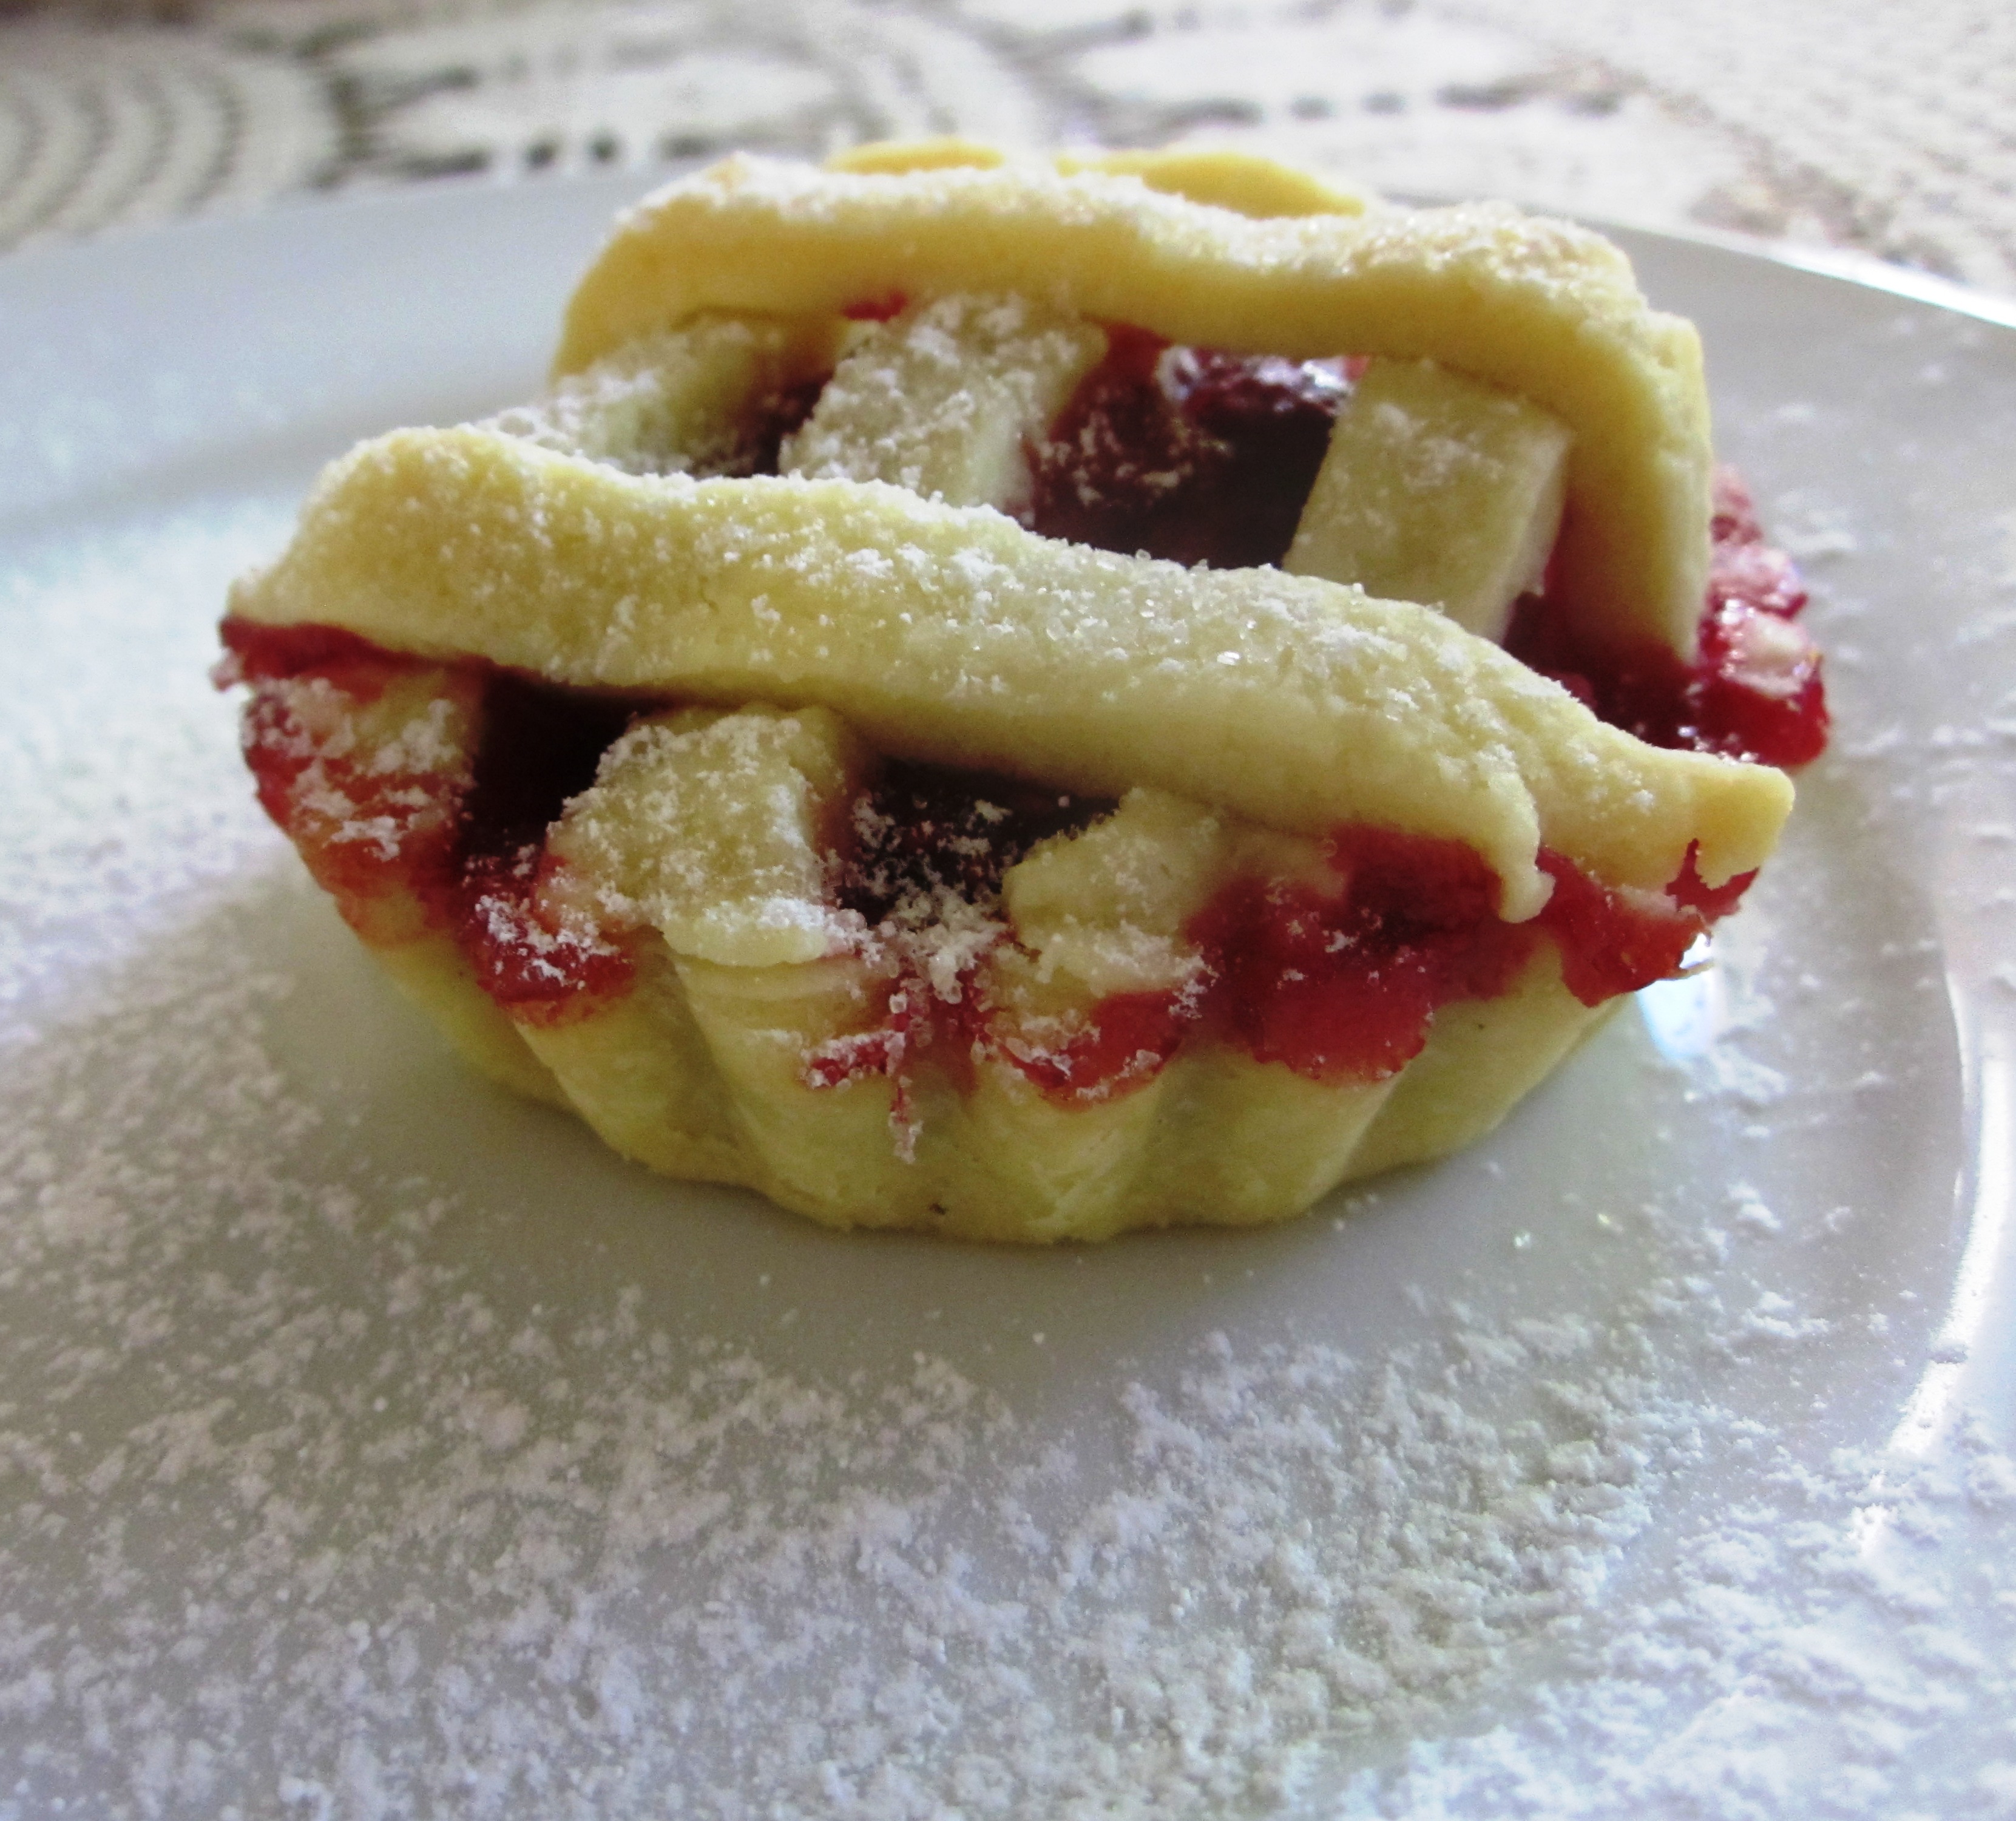
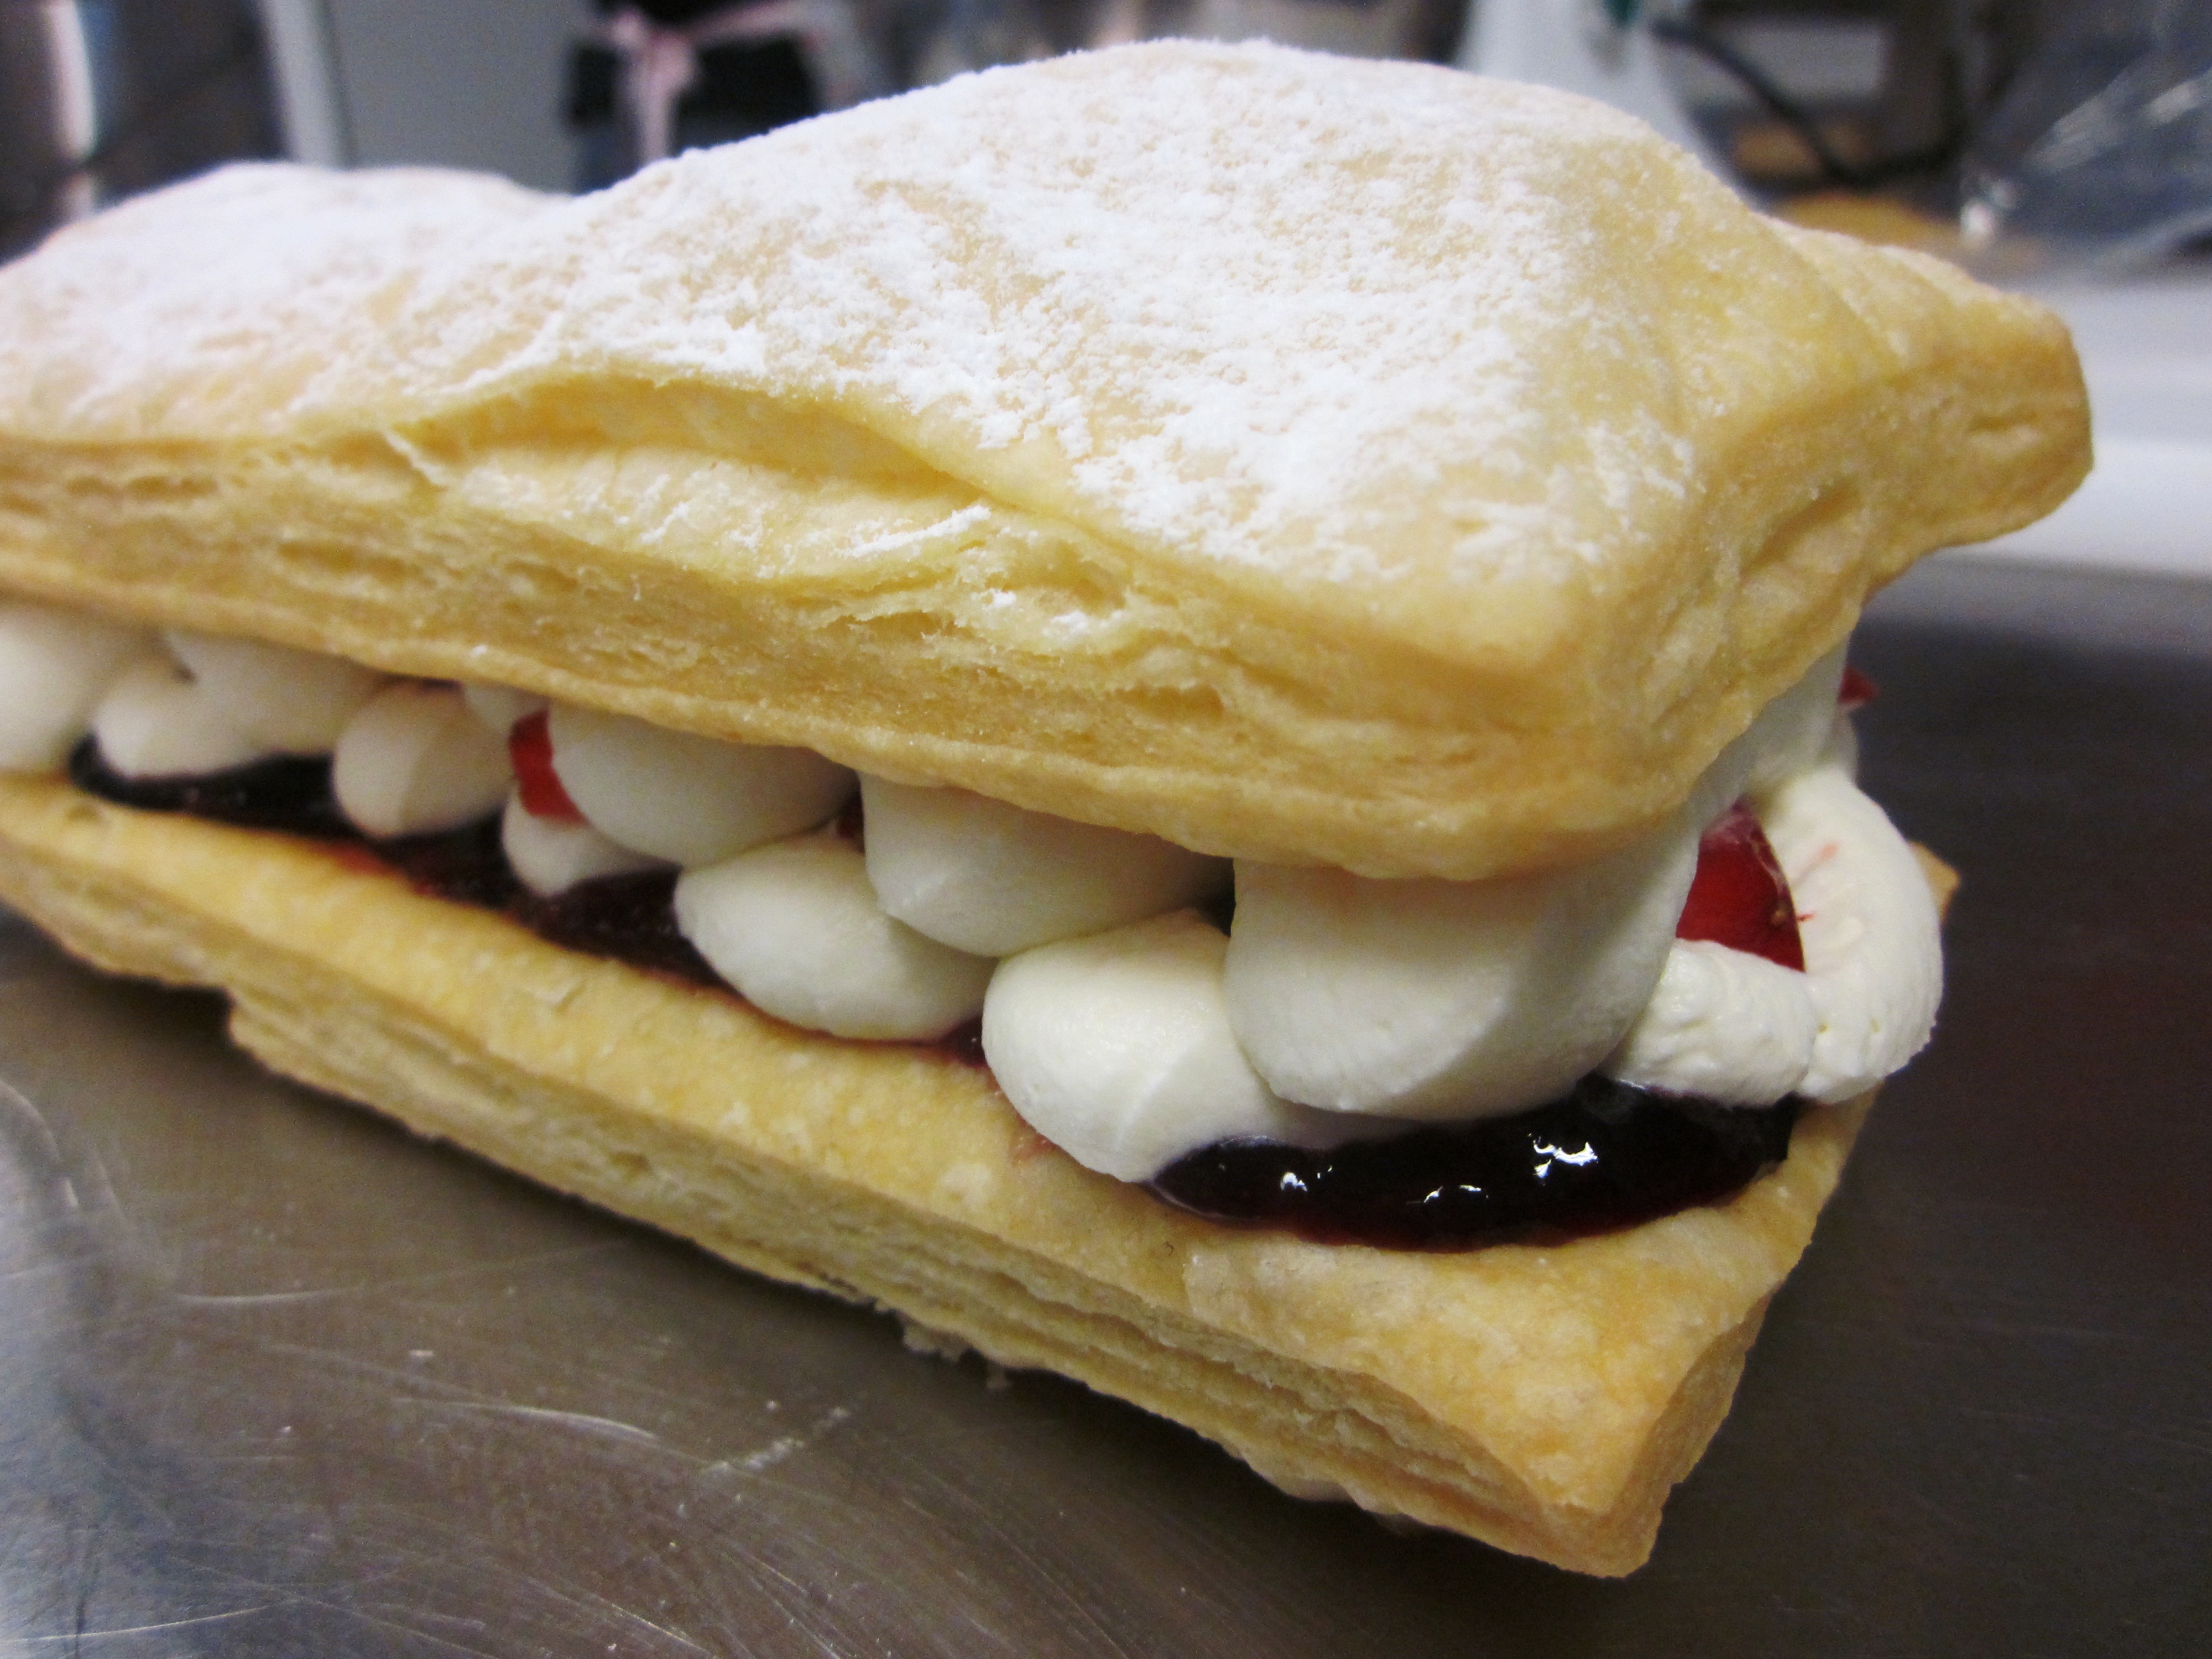
Of all the types of pastry we learnt during the 6 classes I attended, this is the one that I enrolled for and really wanted to do. I was supposed to attend a Mille Feuille class with Sarah at babyCakes last year, but unfortunately it was cancelled due to lack of interest. So I was thrilled when Sarah told me about the 6 week pastry class at TuartCollege, which included a class on Mille Feuille using rough puff pastry.

I’ve really enjoyed this 6 week course and have found my confidence with pastry has really grown. I can’t wait to give full blown puff pastry a try when I have time at home. But in the meantime, it’s great to now have this quicker rough puff pastry up my sleeve. It tastes great, with the flaky layers, rise and crispness you expect from puff pastry, but in a lot less time. Yum.

Next time I make it at home, I will take step by step photos of the folding and update the post. But for now at least, here is the recipe.

Click here for the recipe

Beetroot, pumpkin and caramelised onion tarte tartin

tarte tartin

Time for another meat free Monday recipe. I have never made a tarte tartin before, and instead of trying the normal sweet variety, I decided I wanted to make a beetroot and pumpkin one. I looked at a few different recipes, but couldn’t find what I wanted. So I made this one up as I went. I did cheat and used bought puff pastry. I’m not quite up to home made puff pastry, but I’m almost there. I made a great rough puff in class the other week (which I will post about next).

I was very happy with the end result flavour wise. The balsamic vinegar is a great match for the earthiness of the beetroot, and there is a nice savoury sweetness from the caramelised onions and roast butternut pumpkin. And of course the crisp puff pastry and ‘caramel’ (in this case reduced balsamic and brown sugar). Unfortunately I didn’t quite cook my pastry enough when I made this for the first time, however the next day when it was cooked for an extra ten minutes it was perfect, so I have adjusted this recipe to give the pastry that extra ten minutes.

CLick here for the recipe

Lemon curd (lemon butter)

Lemon curd

If you have read any of my past posts, you will know that I love anything citrus based. Tart desserts are my favourite and I will always go for a citrus or berry dessert, rather than chocolate. I think my love of all things tart must come from my Nanna. I remember hearing tales of how, when she was a young girl,  she would get sent to the shop with the vinegar bottle to fill it up, and by the time she was home it was half empty because she had been drinking it on the way home!

So it will come as no surprise that lemon curd (or lemon butter) is a favourite of mine. Unfortunately, I find almost all of the lemon curd you can buy in shops tastes overly sweet and artificial, and doesn’t have that lovely tartness that I expect in lemon curd. So it is something that I much prefer to make myself. And with this recipe, it is easy to make at home.

I discovered this recipe a few years back when making Gary Mehigan’s Lemon Curd Mousse with Gingernut Crumble (a great dessert that I will have to make and post soon). This lemon curd  is actually made in the microwave (although you could do it in a bowl over a pan of simmering water if you prefer, however you need to stir it constantly if you cook it this way). It is a much quicker and easier than other recipes I have tried, and doesn’t need the constant stirring of the usual method. The end result is the best lemon curd I have ever made, beautifully tart with a wonderful creamy, glossy texture. The other thing I like about this recipe is that it specifies the volume of lemon juice you need. The amount of juice in lemons can vary so much, that I prefer having the volume specified in a recipe such as this where you are relying on the lemon as your main flavour. When I have tried other recipes, I  found I had to keep adding more, trying as I went, to get the right tart lemon flavour (not something I encourage you to do with raw eggs!). This recipe removes the trial and error  and I get the same result each time I make it.

Of course, if you prefer your lemon curd a bit sweeter, just add more sugar. That is the joy of making your own, you can make it just the way you like it.

Lemon curd

Click here for the recipe

Pastry making class weeks 3 & 4 – Rhubarb and raspberry lattice tart

Rhubarb berry lattice

Week 3 of the 6 week pastry making class I have been attending was all about chocolate pastry. We learnt how to make a chocolate pastry which was cooked and then filled with ganache. The pastry was the same recipe as the sweet pastry we learnt in week two, but with the addition of 40g cocoa in place of some of the flour.

I haven’t made these again since the class as it is just too much chocolate for me (I know, I’m strange). However the recipe for the sweet pastry (including the note on how to make it chocolate) is here and I have previously posted a recipe for chocolate ganache here.

Sorry about the photo

Last week we made apple and berry lattice tarts which was something I was really looking forward to (I love anything with berries in it). This tart uses a very short pastry that is equal parts flour to butter. It can be used for either sweet or savoury baking and for this tart the filling and pastry are cooked at the same time. The basic filling recipe can be adapted with many different combinations of fruits, with our teacher Sarah Brigden (from babyCakes) recommending rhubarb and raspberry . I didn’t  really eat rhubarb growing up (my Dad doesn’t like it). However it is now one of my favourite fruits to use in desserts (along with citrus and berries) due to its tartness. So I had to give it a try.

The rhubarb filling is wetter when it cooks than the apple filling, so it seems to take a bit longer to cook the pastry as a result. The end result though is delicious. The tart, tangy sweetness of the rhubarb and raspberry contrast the rich buttery pastry perfectly. I would definitely recommend giving this one a go. The pastry is a bit trickier to work with than the other sweet pastry we learnt in week 2, so I wouldn’t recommend it for a first attempt at pastry. But if you give it a little time to rest in the fridge, and return it to the fridge when it gets too warm, it is easier to work with.

I have found that with practicing at home outside of class, I am getting a lot better and quicker at handling pastry. Also, with all the classes I have attended over the last year, I have found that if I try and replicate the recipes fairly soon after attending the class, I remember the specific techniques and tricks a lot better.

Click here for the recipe

Gluten free orange and almond cake

Orange and almond cake

This week has been a very busy week, and I woke up this morning feeling like I was starting to come down with a cold. After a quiet morning, resting to try and keep the cold at bay, I felt the need to bake something. And oranges are good when you have a cold, right?

Browsing through some new magazines, I came across this recipe for a gluten-free orange and almond cake. I’ve wanted to cook one of these cakes for quite some time. Usually, they involve cooking a couple of oranges whole in water for 1-2 hours before blitzing them for the cake (seeds and all). This recipe interested me as you cut up the oranges, removed the seeds and cook them for only 30 minutes , so I decided to give it a go.

If you have a stand mixer and food processor, this is an easy recipe to prepare. The result is a beautiful moist cake. Serve it hot with some orange syrup and ice-cream for a dessert, or cold as a nice cake for afternoon tea. If you want to add more moisture or sweetness, drizzle it with orange syrup when it is out of the oven.

Orange and almond cake

Click here for the recipe

Pastry making class week 2 – Lemon tart (and apple rose tarts)

I have been looking forward to the Australian version of the Great British Bake Off ever since I heard it was being filmed. However I am starting to wonder if, when they advertised that it would air after Easter, they meant Easter 2014!

While waiting, I have been revisiting the original British version and discovering the blogs of some of the past contestants. One of the things I have wanted to try for some time are Mary-Anne’s (Season 2) apple rose tarts. I found Mary-Anne one of the most interesting contestants on The Great British Bake off, with her recipes utilising unique techniques based on a lot of research and historical recipes (and a collection of over 900 cookbooks, which puts my 200 to shame). I thought these tarts were beautiful so I decided to try the apple rose component today while I was making a batch of Lemon Tarts from my second pastry making course (with Sarah Brigden from babyCakes).

Lemon tart
Lemon tarts

I won’t repeat the instructions here, as they are already provided so well by Mary-Anne on her site Time To Cook – Online. As I just wanted to try the roses today, I made the sweet pastry that I learnt in class, and a crème patisserie recipe that I had previously learnt from Sarah (which I will post in a few weeks). I followed Mary-Anne’s instructions to make the apple roses (although without returning them to the oven to bake). Although they are a little fiddly, they are very effective and I’m sure they get a bit easier with practice. I quite liked the freshness of the apple after poaching them in the apple syrup and not baking them further.

As long as you chill the pastry well before rolling it, I think this pastry is quite easy to work with. I like adding some orange or lemon zest to the pastry for an extra citrus hit. The citrus filling is beautifully creamy and tangy and I certainly recommend giving these a try. And the apple rose tarts look beautiful and very effective, and are not too difficult to achieve. Next time I will give Mary-Anne’s apple custard filling a go as well and bake the apple roses.

apple roses

Click here for the recipe